If you are working in a beauty salon, then you must know how it feels to stay after hours and clean all the equipment you used that day. It can be a lengthy process, and you might not love it, but it is necessary.
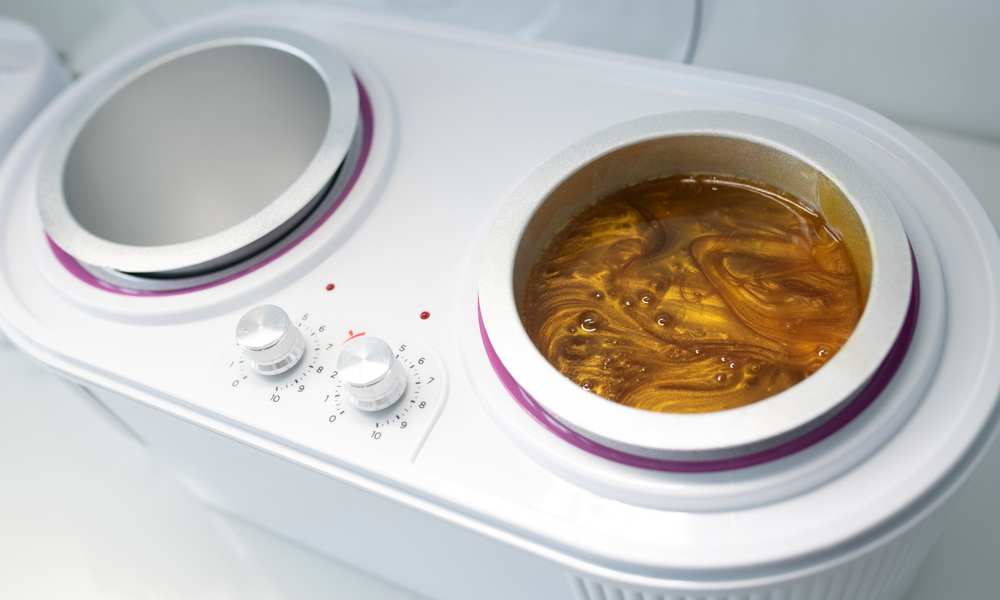
You have cleaned a lot of brushes, but have you learned how to clean wax warmer? This one includes some sticky substances, and you should know how to clean it properly.
If you have just started or are looking for quick and effective ways in which you can clean your wax warmer, stay with us, and we will guide you through a 6 step procedure that will make your wax warmer spotless in no time.
Only 6 Steps
Cleaning a wax warmer is not rocket science. You can do it correctly in just a couple of minutes by following these six steps, so let’s get right to it.
1. Warm Up The Heater
Although many people might leave the wax to cool off after the last treatment is done, this is a mistake. If your wax is left at room temperature, it might be hard to remove it from the pot. So, the best thing for you to do would be to heat up the warmer a little. When you see that the wax has melted and turned into liquid, turn it off, and you can continue with the next step.
2. Save The Remains
If you haven’t used up a fair amount of wax during your last treatment, you can “recycle” it by pouring it into a 100% sterilized container. Take this seriously because wax that hasn’t been stored and kept in the right conditions can seriously damage someone’s skin, and nobody wants that.
3. Use Wax Strips
After you have removed what was left of your wax or recycled it, you can use wax strips or some paper (whatever you find convenient) and remove the remains.
Never use cotton pads because they will stick, and you will make a huge mess!
4. Sterilizing The Pot
Because of the substance you are using. You will have to sterilize your pot where you pour the wax. You can do this in a couple of ways: with boiling water, UV towel sterilizers, or even getting it professionally clean. Don’t forget. The pot isn’t the only thing you should sterilize. It would be best if you did this also with aluminum pots, tweezers, etc.
5. Applying Oils
During the process of waxing, you might come across some drips and stains from wax on your warmer. You can easily remove this by using mineral oil and cloth.
6. Paper Towels Protection
To save yourself and the warmer from any further possible damage, use towels. Place a couple of paper collars around the wax warmer to protect the wax from falling out and staining.
Be Careful
Sometimes, your attention can drift away, and you can easily create some irreparable damage. Protect yourself from that happening with these reminders:
- No heating the wax warmer if there is no wax inside.
- Never leave the heater turned off during the night.
- Never soak the wax warmer in water.
- Be sure to cut the power before cleaning.
- Do not clean the wax warmer with bare hands.
- Dry the container before using it again.
Melting Hard Wax Beans

Today, a majority of salons work with hard wax beans for their waxing treatment. When dealing with this kind of substance, there are a couple of ways to melt it, which depends on the machine you are working with.
To show you the possible solutions, we are going to talk about melting hard wax beans in a waxing warmer, on the stove, and in the microwave.
Let’s get down to business.
To start off with the method which has already been mentioned – a waxing warmer. The first thing you do is simply pour the beans in the warmer and set it to the recommended warming time – this is usually medium.
Melting them usually takes from 35-45 minutes, but check the product instructions and keep an eye on your wax. You should maintain the wax temperature around 52–71 °C. This way, it is ideal for waxing – not too cold and not too hot.
The second option would be melting hard wax beans on a stove. This is practical for someone who is doing the waxing in the comfort of their own home. To do this, you will need a heat resistant bowl and a pot.
Pour the water into the bowl and wait until it boils. Put the pot on top of the bowl and reduce the heat. Pour the hard beans into the pot and stir the mixture. Turn off the heat when your thermometer reaches 66 °C.
The last option would be melting the hard wax beans in the microwave. This is also primarily intended for people who do this kind of treatment at home.
First, you should pour the hard beans into a bowl, which is safe to go in the microwave. Set your microwave to 20 percent and heat the wax for 10 seconds. After it is done, please take out the wax and stir it with a wooden spatula or spoon, for example. Repeat this process for 10 seconds until the wax is completely melted.
Because there is heat and wax combined, this requires your full attention.
At-Home Waxing Tips
For those who choose to do waxing at home, here are a couple of tips that could come in handy.
- Test the wax temperature – be sure that the wax is not too hot or too cold.
- Apply the wax in the direction of growth – apply only in the growth direction, do not do it the other way around because you will hurt your skin.
- Exfoliate skin – whatever you are waxing, you must exfoliate it with a scrub, brush, or mint.
Appy aftercare products – many people skip this step, and it shouldn’t be like that. It would help if you never forgot to put some aftercare product on the part that you waxed.
- Remove any wax residue – after you are done with waxing, check your skin for any wax that you may be missed.
Types And Wax Lingo
For a worker in a salon, there are some things you are just required to know – and some of them are types of waxes and the language regarding the waxing process.
First, let’s list some of the basic types of wax.
- Paraffin – the most popular and commonly used wax.
- Soy – all-natural and made from soybeans.
- Parasoy – this is a perfect combination of paraffin and soy wax.
- Palm – this is all-natural, derived from palm trees.
And now, some useful phrases you might have heard:
- Cold throw – the strength or different scents before melting the wax.
- Hot throw – the strength of different scents after melting the wax.
- Turn around time – the time between making and receiving an order for a wax.
- Melt point – the temperature at which the wax starts to melt.
The Top 4

If you think it’s time to renew your old wax warmers and treat yourself with some new ones, here are the top 4 wax warmers on the market right now:
- Femiro Wax Warmer – this comes with all the needed equipment, and it is user-friendly.
- Wax Warmer: Abody Hair Removal Waxing Kit – this one comes with an adjustable temperature knob and a see-through vented cover.
- Larbois Waxing Kit Wax Warmer – this is a sleek and digital waxing warmer available at a very reasonable price.
- GiGi Space Saver Wax Warmer – this mini wax warmer not only saves you some space but keeps your wax at an optimal temperature for a whole day.
How To Clean Wax Warmer – Conclusion
Have you learned how to clean wax warmer? This one includes some sticky substances, and you should know how to clean it properly. All you have to do is follow these steps: warm up the heater so that the wax has melted, you can save the remains by recycling it, use wax strips or papers to remove the residue in the warmer, sterilize the pot and everything that contains wax on it, apply some oil to clean and put paper towels for further protection.
When you are dealing with such a sensitive substance, there are some things you simply can’t to, such as no heating the wax warmer if there is no wax inside, never leave the heater turned off during the night, never soak the wax warmer in water, be sure to cut the power before cleaning, do not clean the wax warmer with bare hands and dry the container before using it again.
If you are new to using hard beans for wax, here is how you should melt them. You can choose between using a wax warmer, a microwave, and a stove. The process is pretty similar. Whatever you use, you must keep an eye on the heat and stir the wax regularly. The best temperature for wax is somewhere between 52–71 °C.
Here are some useful at-home waxing tips – exfoliate your skin, check the waxing temperature, apply aftercare products, etc.
There are different types of waxes: paraffin, soy parasoy, and palm, and some of the best wax warmers out there right now are Femiro Wax Warmer, Wax Warmer: Abody Hair Removal Waxing Kit, and GiGi Space Saver Wax Warmer.

